
Deploy OpenClaw
[Jun '26] Self Host OpenClaw on Railway. All in one Bundle.
OpenClaw (Prev Moltbot, Clawdbot)
Just deployed
/data
![]()
Deploy and Host OpenClaw (Moltbot/Clawdbot) – Autonomous AI Agent Platform on Railway
OpenClaw (formerly Clawdbot/Moltbot) is a powerful, open-source AI agent framework that lets you run Claude, ChatGPT, or Gemini as your own self-hosted private personal assistant.
Chat securely through the built-in web dashboard, or integrate with Telegram, Discord, and Slack. OpenClaw can execute code, browse the web autonomously, schedule cron tasks, and maintain infinite long-term conversation context. Deploy your own privacy-first AI alternative to ChatGPT on Railway in just one click!
🚀 Quick Start Deployment Guide
Step 1: Deploy on Railway
- Click the "Deploy on Railway" button at the top of this page & wait for the initial deployment to complete (~3-5 minutes)
Step 2: Note Your Credentials
Check the Variables tab and save following:
- SETUP_PASSWORD: Your password for accessing the setup wizard
⚠️ Keep this secure! You'll need this in the next steps.
Step 3: Access Setup Wizard
- Click on the URL provided by Railway in your project dashboard (e.g.,
https://your-app-xyz.up.railway.app) - Login prompt appears:
- Username: Leave blank (press Enter)
- Password: Enter your
SETUP_PASSWORD
Step 4: Complete the Setup Wizard
Once you log in, follow the intuitive 7-step guide on the left side of the setup screen to bring your AI agent online:
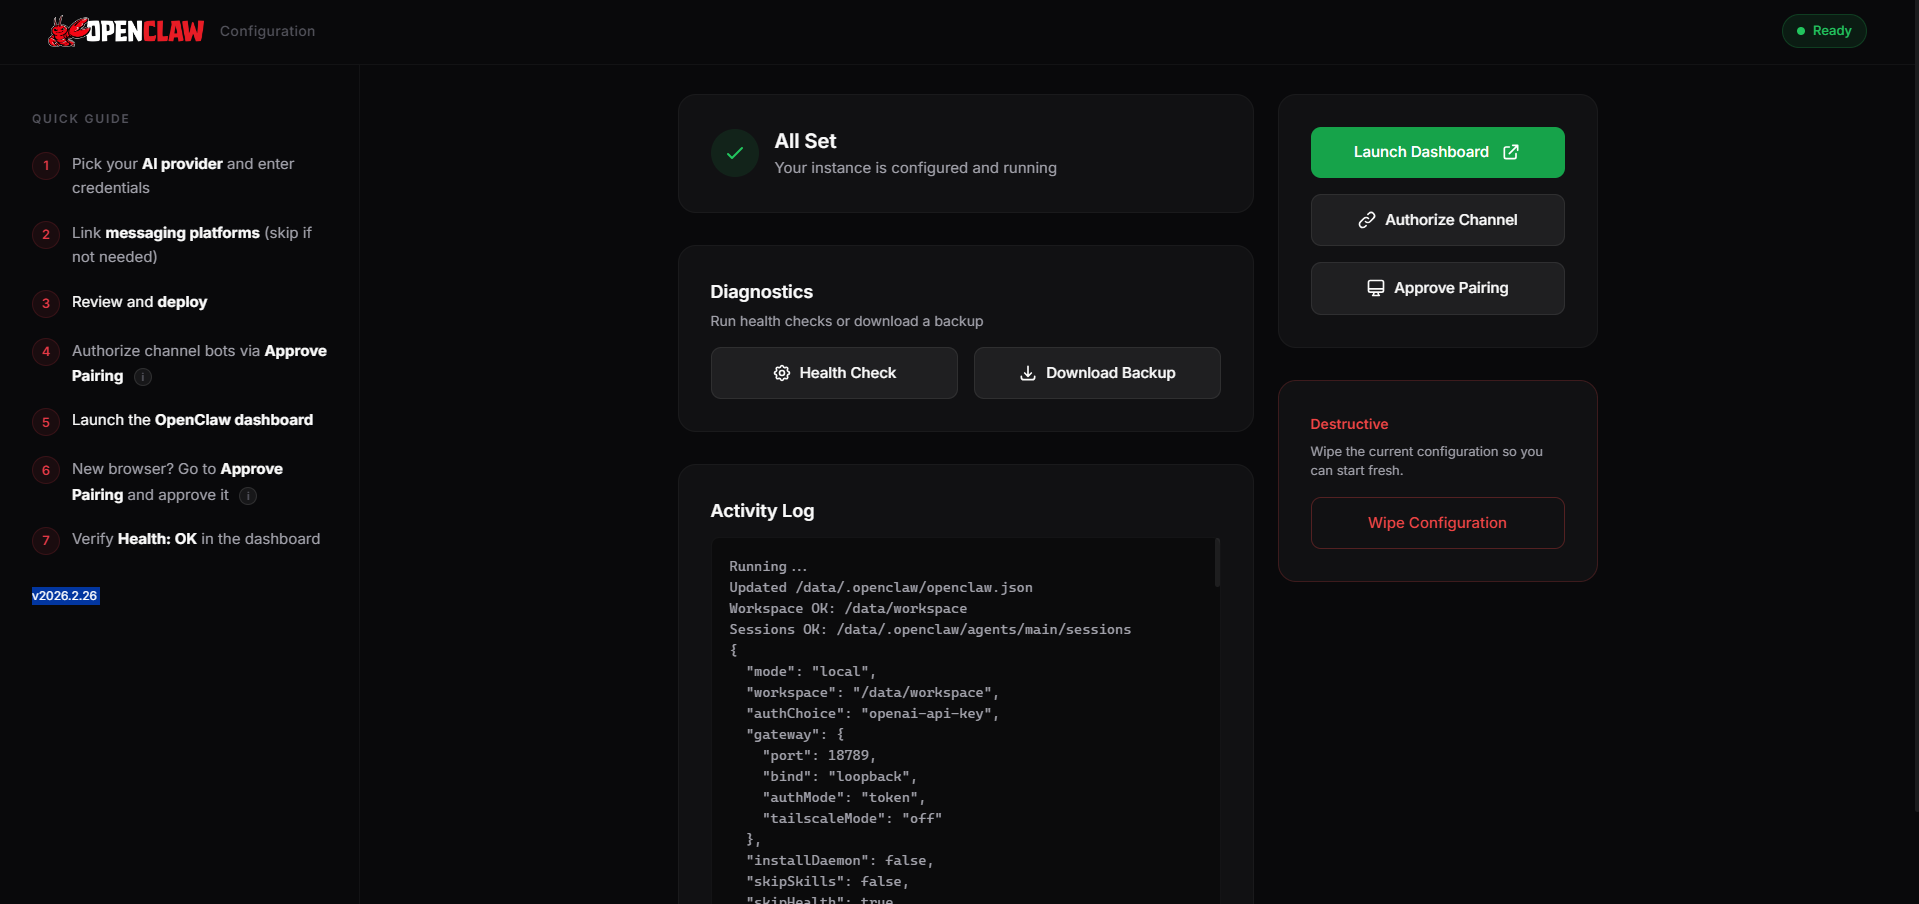
- Select your provider & auth type, then paste your API key
- Add channels (optional — can be done later)
- Click Run Setup
- If you added a channel token, click Authorize Channel and enter the code (After setup, message your bot on the channel. It will reply with a pairing code. Enter that code here to grant DM access.)
- Click Launch Dashboard
- First login? Click Approve Pairing → Approve Latest Request (New browsers need a one-time device approval. After clicking "Launch Dashboard", come back here, click "Approve Pairing", and approve the pending request.)
- You should now see Health: OK in the OpenClaw UI.

Step 5: Start Chatting
- Click "Chat" in the sidebar of the newly opened OpenClaw UI
- Type your first message
- Enjoy your self-hosted AI assistant! 🎉
About Hosting OpenClaw (Prev Clawdbot, Moltbot) – Self-Hosted AI Agents
Deploying OpenClaw on Railway traditionally requires interactive terminal access for onboarding, which Railway doesn't provide. This template solves that challenge by wrapping OpenClaw's gateway with a web-based setup wizard. You get a one-click deployment with browser-based configuration—no CLI commands needed. This template lets you deploy OpenClaw in 1 click.
Common Use Cases
- Personal AI Assistant: Chat with Claude/GPT via web interface or messaging apps for research, coding help, writing, and daily tasks
- Automated Workflows: Schedule recurring tasks, monitor websites, send notifications, and automate repetitive processes using cron jobs
Dependencies for OpenClaw (Prev Clawdbot, Moltbot) – Self-Hosted AI Agents Hosting
- AI Provider API Key: Anthropic Claude, OpenAI GPT, Google Gemini, or other supported providers
Deployment Dependencies
- OpenClaw GitHub Repository - Source code for the AI agent framework
- Anthropic API Keys - Claude AI models (recommended)
- OpenAI API Keys - GPT models (alternative)
- Google AI Studio - Gemini models (alternative)
- Telegram BotFather - Create Telegram bots for messaging
- Discord Developer Portal - Create Discord bots
🔑 How to Get API Keys for Different AI Providers
How to Get an Anthropic API Key? (Claude - Recommended)
- Visit Anthropic Console
- Sign up/log in → Navigate to "API Keys" in the left sidebar → Click "Create Key"
- Name your key (e.g., "OpenClaw Railway") → Copy the key → Paste into the setup wizard
How to Get an OpenAI API Key? (GPT)
- Go to OpenAI Platform
- Create an account or sign in → Click on your profile → "View API Keys"
- Click "Create new secret key" → Name it (optional) and click "Create"
- Copy the key → Paste into the setup wizard
How to Get a Google Gemini API Key?
- Visit Google AI Studio
- Sign in with your Google account
- Click "Get API Key" in the left menu
- Select existing project or create new
- Click "Create API Key"
- Copy the generated key
- Paste into the setup wizard
💬 How to Add Messaging Channels to OpenClaw
How to Add a Telegram Bot?
Step 1: Create Your Bot
- Open Telegram and search for
@BotFather - Send the command:
/newbot - Choose a display name: "My OpenClaw Assistant"
- Choose a username:
my_openclaw_bot(must end with 'bot') - BotFather will give you a token (format:
123456789:ABCdef...) - Copy this token
Step 2: Add to OpenClaw
- Go to your setup wizard:
/setup - Scroll to "Optional: Channels" section
- Paste token in "Telegram bot token" field
- Click "Run Setup"
- Wait for completion
Step 3: Start Chatting
- Search for your bot username in Telegram
- Click "Start" or send
/start - Begin chatting with your AI agent!
How to Add a Discord Bot?
Step 1: Create Discord Application
- Go to Discord Developer Portal
- Click "New Application"
- Name it (e.g., "OpenClaw Bot")
- Go to "Bot" tab in left sidebar
- Click "Add Bot" → Confirm
Step 2: Configure Bot
- Under "Privileged Gateway Intents":
- ✅ Enable "MESSAGE CONTENT INTENT" (Required!)
- Click "Reset Token" → Copy the token
- Save the token securely
Step 3: Invite Bot to Your Server
- Go to "OAuth2" → "URL Generator"
- Select scopes:
- ✅
bot - ✅
applications.commands
- ✅
- Select permissions:
- ✅ Read Messages/View Channels
- ✅ Send Messages
- ✅ Read Message History
- ✅ Embed Links
- Copy the generated URL
- Open URL in browser → Select server → Authorize
Step 4: Add to OpenClaw
- Go to your setup wizard:
/setup - Paste token in "Discord bot token" field
- Click "Run Setup"
- Mention
@YourBotNamein Discord to chat!
❓ Frequently Asked Questions (FAQ)
What is the difference between OpenClaw, Clawdbot, and Moltbot?
OpenClaw is the current official name of the project. It was previously known as "Clawdbot" and "Moltbot" - these are older names for the same framework.
How much does it cost to run OpenClaw on Railway?
Railway costs: $5-10/month on the Hobby plan ($5/month subscription + ~$5 usage). Free tier available with limitations.
AI API costs: Varies by usage and provider:
- Anthropic Claude: ~$5-30/month for moderate personal use
- OpenAI GPT: ~$5-40/month depending on model and usage
- Google Gemini: Often free for personal use
Is my data private and secure on OpenClaw?
Yes! OpenClaw is self-hosted, meaning:
- All data stays on your Railway instance
- API keys are encrypted and stored in your volume
- Communication between browser and gateway is encrypted (HTTPS)
Can I migrate my OpenClaw instance off Railway?
Absolutely! That's the beauty of self-hosting:
- Export a backup via
/setup - Download the
.tar.gzfile - Deploy OpenClaw on another platform (VPS, Docker, home server)
- Import the backup on your new instance
Can I use OpenClaw without any messaging channels?
Yes! The web UI at / provides a full-featured chat interface. Telegram, Discord, and Slack are optional additions for convenience. You can use OpenClaw entirely through the web interface if you prefer.
How do I access OpenClaw from my phone?
- Web Interface: Just visit your Railway URL in your mobile browser
- Telegram: Add the Telegram bot and chat from the Telegram app
- Discord: Use Discord mobile app with your bot
- Slack: Use Slack mobile app with your bot
How to fix: disconnected (1008): pairing required
If you see this error in your dashboard logs or get instantly disconnected when opening the UI, it's a security feature! New browsers/devices need to be manually approved.
Solution: Go back to your /setup wizard page, click the Approve Pairing button on the right side, and approve the pending connection request.
🖥️ How do I access the Terminal UI (TUI)?
If you prefer a hacker-style terminal interface over the web dashboard, you can access the OpenClaw TUI! Ensure you have set the ENABLE_WEB_TUI to True in Railway Variables. You can access the TUI at /tui.
🤝 Found an Issue? Need Help?
If you notice a bug with this Railway template
👉 Raise an issue on GitHub here!
Why Deploy OpenClaw (Moltbot/Clawdbot) – Autonomous AI Agent Platform on Railway?
Railway is a singular platform to deploy your infrastructure stack. Railway will host your infrastructure so you don't have to deal with configuration, while allowing you to vertically and horizontally scale it.
By deploying OpenClaw (Moltbot/Clawdbot) – Autonomous AI Agent Platform on Railway, you are one step closer to supporting a complete full-stack application with minimal burden. Host your servers, databases, AI agents, and more on Railway.
Template Content
OpenClaw (Prev Moltbot, Clawdbot)
praveen-ks-2001/openclaw-railway-template-enhanced