How to Deploy a Lovable App on Railway
Learn how to deploy a Lovable app on Railway.
 Will RaphaelsonUpdated 10 min read
You’ve built an app in Lovable. The preview looks right, your main workflow works, and you’re ready to share it with customers. Now you need to decide where it should run and how you’ll ship the next change.
Keeping hosting in Lovable gives you an integrated experience for building and publishing. Hosting elsewhere lets you choose a separate deployment workflow and add services alongside your app, but you’ll manage that hosting configuration yourself. You can make that choice without giving up the Lovable editor or moving your database on day one.
Railway is a useful fit when you want to deploy from GitHub and give your app room to grow into additional APIs, workers, or other services. This guide takes you from a working Lovable project to a public Railway URL, then shows you how to keep deploying updates as you build.
Where should I deploy my Lovable project?
Choose Railway if you want to keep building in Lovable while running your app through a GitHub deployment workflow, with a place to add backend services as you need them.
For example, your app might start as a customer dashboard connected to Lovable’s backend. Later, you might need a separate API for an integration or a worker to process uploads. Railway gives those processes a home alongside your web app, with deployment logs and configuration in the same project.
If you’re happy with Lovable’s integrated hosting and don’t need a separate deployment workflow, staying there is the simplest option. Lovable also documents external hosting options, including Netlify and Vercel. The useful distinction is how much of the application you want to operate yourself. Lovable’s hosting and ownership guide explains the choices.
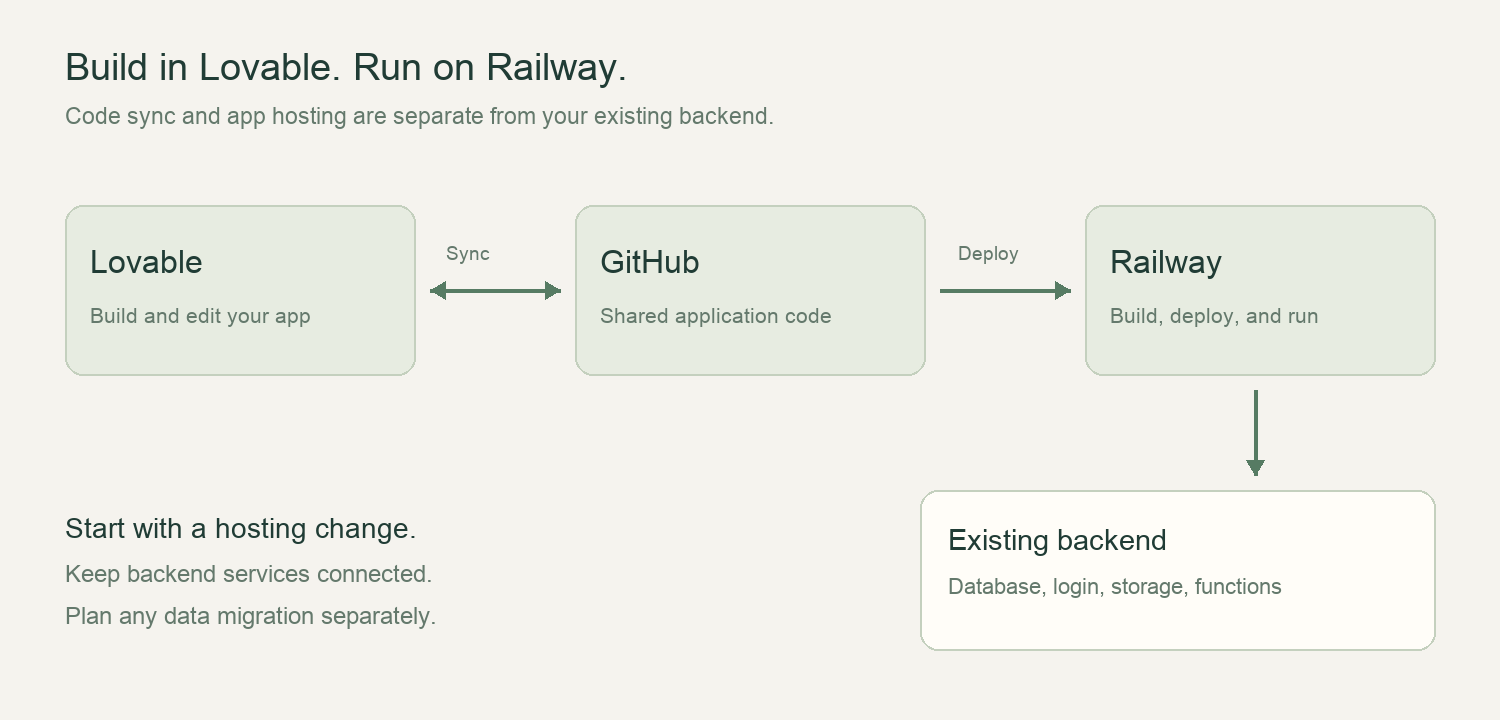
For this walkthrough, start with the smallest change: run the web app on Railway and keep its existing backend connected. Exporting code doesn’t copy your users, database, uploaded files, or backend functions into Railway.
TL;DR
- Connect your Lovable project to GitHub.
- Check whether it needs a server or static file hosting.
- Import the repository into Railway and add its configuration.
- Generate a public domain and test the app.
- Keep building in Lovable. Railway can deploy updates pushed to your connected GitHub branch.
What do you need before deploying?
Start with a working Lovable project, a GitHub account, and a Railway account. If Railway is new to you, its quick start introduces projects and services. You’ll also need access to the configuration of any backend or authentication provider your app uses.
GitHub holds the shared copy of your code. Lovable updates that copy, and Railway uses it to build your deployed app. Lovable’s GitHub integration is available on all plans, so this workflow doesn’t require a paid code download.
Set a hosting budget
Railway’s Hobby plan costs $5 per month and includes $5 of resource usage. If usage exceeds that allowance, you pay the difference. CPU, memory, outbound traffic, and persistent storage contribute to usage; any backend you keep elsewhere has its own billing.
After your first deployment, use the usage dashboard to establish what the app consumes at its normal traffic level. Set an email alert so you can review spending before it surprises you. Railway’s cost controls also include resource limits and compute usage hard limits. Resource limits constrain capacity. An email alert notifies you without stopping services. A compute hard limit takes workloads offline when reached, so choose it with that consequence in mind.
Know what a successful launch looks like
Before changing where users access the app, keep a recoverable version and identify the few things that must work: opening the home page, following a link, signing in, and reading or saving data if your app supports those actions.
Keep server secrets out of browser code. A variable used in a browser bundle is visible to visitors, even if you entered it through a hosting dashboard. For the next stage of your app, Railway’s best practices and production readiness checklist cover reliability, monitoring, security, and recovery.
Step 1: Connect Lovable to GitHub
The GitHub connection lets Railway receive your code while you continue editing in Lovable.
Open your Lovable project’s Git integration settings, connect your GitHub account, and link the project to a repository. Follow the authorization flow and confirm which account or organization will own the repository. The GitHub integration guide covers the current connection screens.
Once connected, make sure your project files appear in GitHub. Note the branch Lovable is syncing. Railway needs to deploy the branch you intend to publish.
Changes can sync in both directions, so you can continue using Lovable and also work on the code outside it. Treat commits to your production deployment branch as changes that can reach customers.
Step 2: Prepare your app to run outside Lovable
Your app needs a production build and a way to run that build. The right setup depends on what Lovable generated.
Open package.json in the project’s code view, or ask Lovable:
Does this project use TanStack Start or older React + Vite? Explain how its production build runs outside Lovable.
A project with @tanstack/react-start needs a server. An older React + Vite app produces static browser files. Follow the matching path below.
For a TanStack Start app
TanStack Start runs part of your app on the server, so uploading only browser files won’t run the complete application.
Lovable’s external hosting guide documents building for a Node server through Nitro, the tool that prepares the server output. For projects using Lovable’s build configuration wrapper, the companion example keeps the configuration explicit:
import { defineConfig } from "@lovable.dev/vite-tanstack-config";

export default defineConfig({ nitro: { preset: "node-server" } });
Preserve any other options your project already passes to defineConfig. The project also needs the required Nitro dependency and a compatible Node.js version. Use Node.js 22 for the companion example. Its production start script runs the generated server:
{
  "scripts": {
    "build": "vite build",
    "start": "node .output/server/index.mjs"
  }
}
These are excerpts from the companion server example. Your existing app may already have the equivalent setup. Avoid replacing its scripts or configuration wholesale. Railway’s TanStack Start guide explains the server build and start options in more detail.
For an older React + Vite app
A Vite single-page app builds static files, usually in dist. Railway’s builder, Railpack, supports detecting Vite apps and serving their static output.
Keep the existing build script and let Railway detect the app first. You don’t need to add a server package to every Vite project. An existing custom start command can change how Railpack handles it, so check the logs if the detected behavior differs from what you expect.
Client-side routing also matters. A visitor opening a nested URL directly must receive the app’s HTML so the browser can render the correct page. You’ll test that after deployment.
Step 3: Deploy your repository on Railway
With the code connected and the app type identified, you can create the service that will run it.
- In Railway, create a new project.
- Choose Deploy from GitHub repo and select your Lovable-connected repository.
- Confirm the source branch in the service settings.
- Add the configuration your app needs in the service’s Variables tab. For the Nitro server path, set
HOSTto0.0.0.0; Railway suppliesPORT. - Apply the pending changes and follow the build and deployment logs.
A Railway service is the running application inside your project. The build logs show how Railway installs dependencies and prepares the app; deployment logs show what happens when it starts.
Bring the configuration, keep the backend
Use the values and variable names your app actually reads. For a project connected to a Supabase-compatible backend, you may see browser-facing settings such as VITE_SUPABASE_URL and a publishable key. Older projects can use different names, including an anonymous key variable. Copy the names from your code rather than renaming them to match an example.
Values prefixed with VITE_ are embedded in the browser bundle during the build. Set them before building, and rebuild after changing them. Server code can need a separate set of runtime values and private credentials.
Keep privileged keys on the server. A public or publishable backend key still depends on properly configured authorization rules; it isn’t a substitute for access control.
For the first deployment, leave the existing backend in place. A Railway Postgres database doesn’t automatically replace the authentication, storage, functions, or authorization behavior your app already uses.
If your repository contains multiple independent apps, use Railway’s monorepo settings to choose the correct service root directory and build/start settings. The companion examples use separate roots for the server and static variants; a standard Lovable repository generally needs only its own app service.
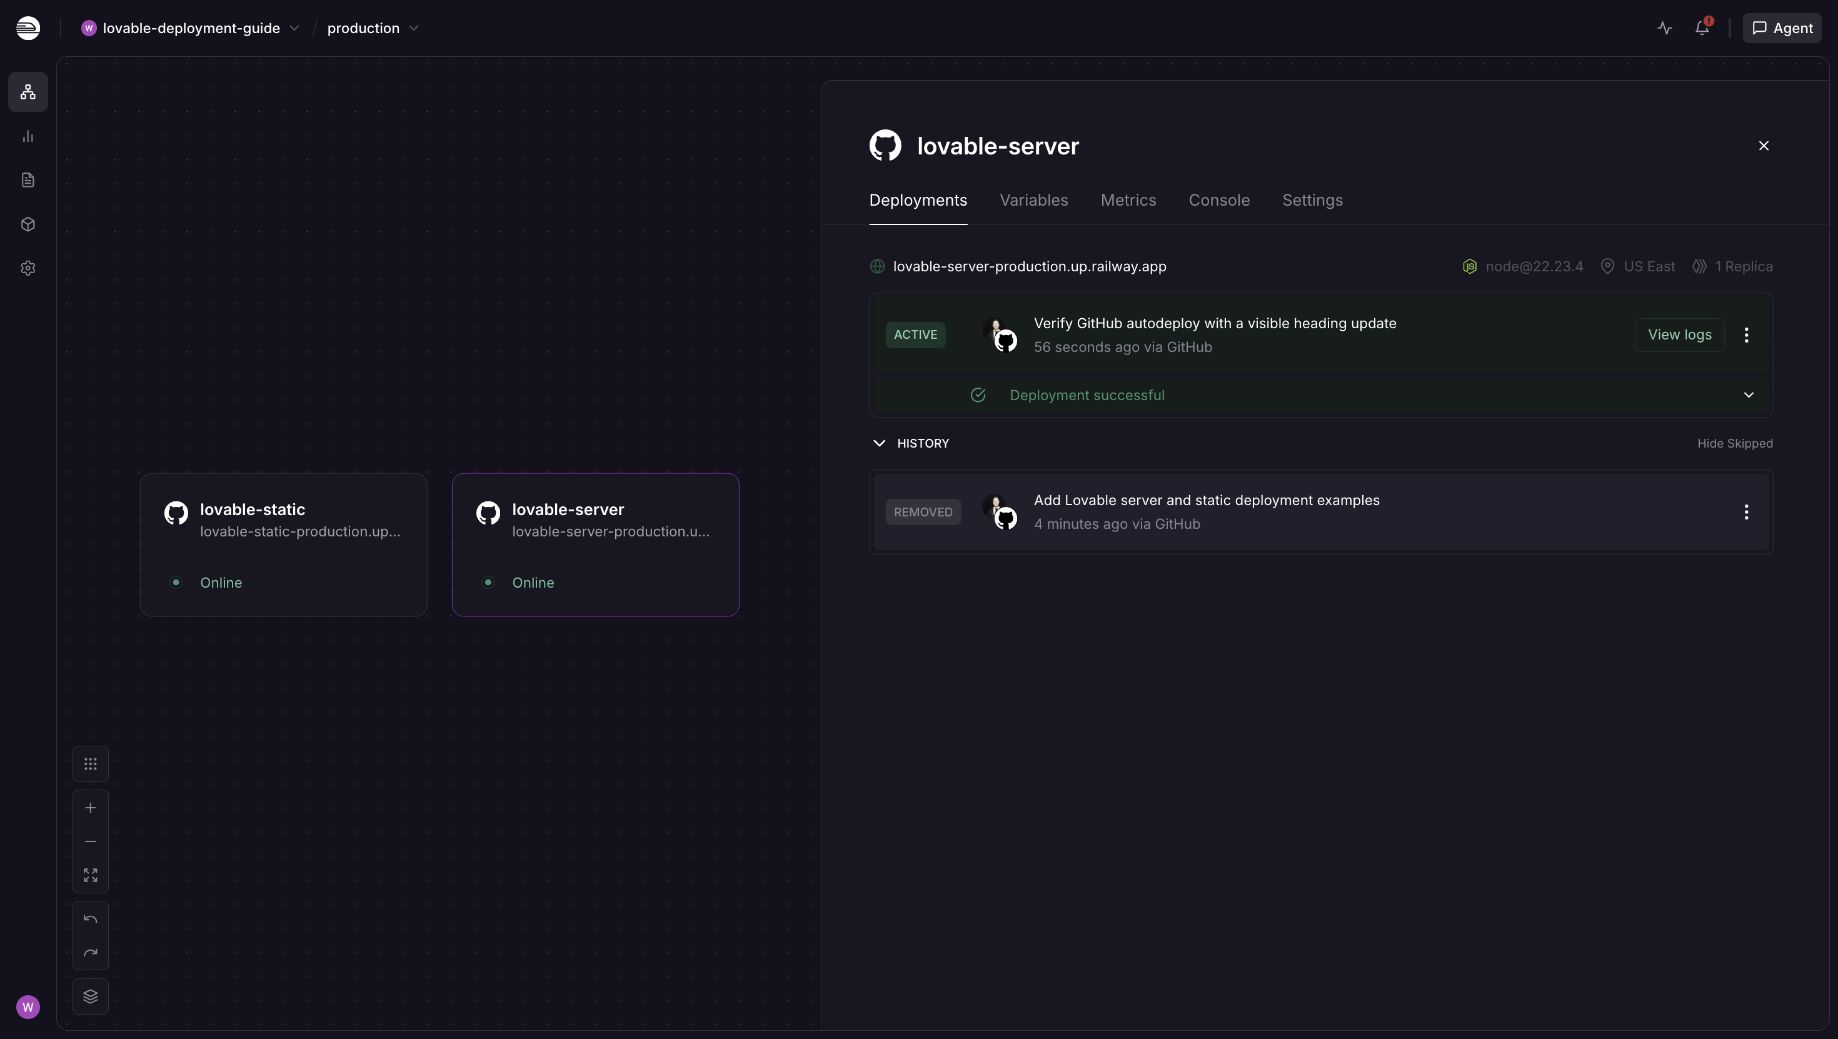
Each sample runs as its own service. Your project only needs the path that matches your app.
Step 4: Generate a public URL and test the app
A deployed service needs a public domain before visitors can reach it.
Open the service’s Settings → Networking → Public Networking and choose Generate Domain. Railway’s public networking documentation covers this setup. For a server app, ensure the process listens on the service’s port and accepts connections on 0.0.0.0.
Open the generated URL and check the behavior customers will use:
- Load the home page in a new browser tab.
- Open a nested URL directly, then refresh it.
- For a server app, exercise a page or action that uses server code.
- If the app has login, add the new URL to the authentication provider’s allowed redirect URLs and test sign-in.
- Read or save a real test record, and confirm access rules behave correctly.
A successful build is the beginning of this check. Routes, authentication redirects, and backend connections also need to work from the new URL.
Once the Railway-provided URL works, you can add a custom domain. Keep your existing public entry point until you’ve checked the replacement.
Step 5: Keep building in Lovable and deploy updates
Once the initial deployment works, you can use the same path for subsequent changes.
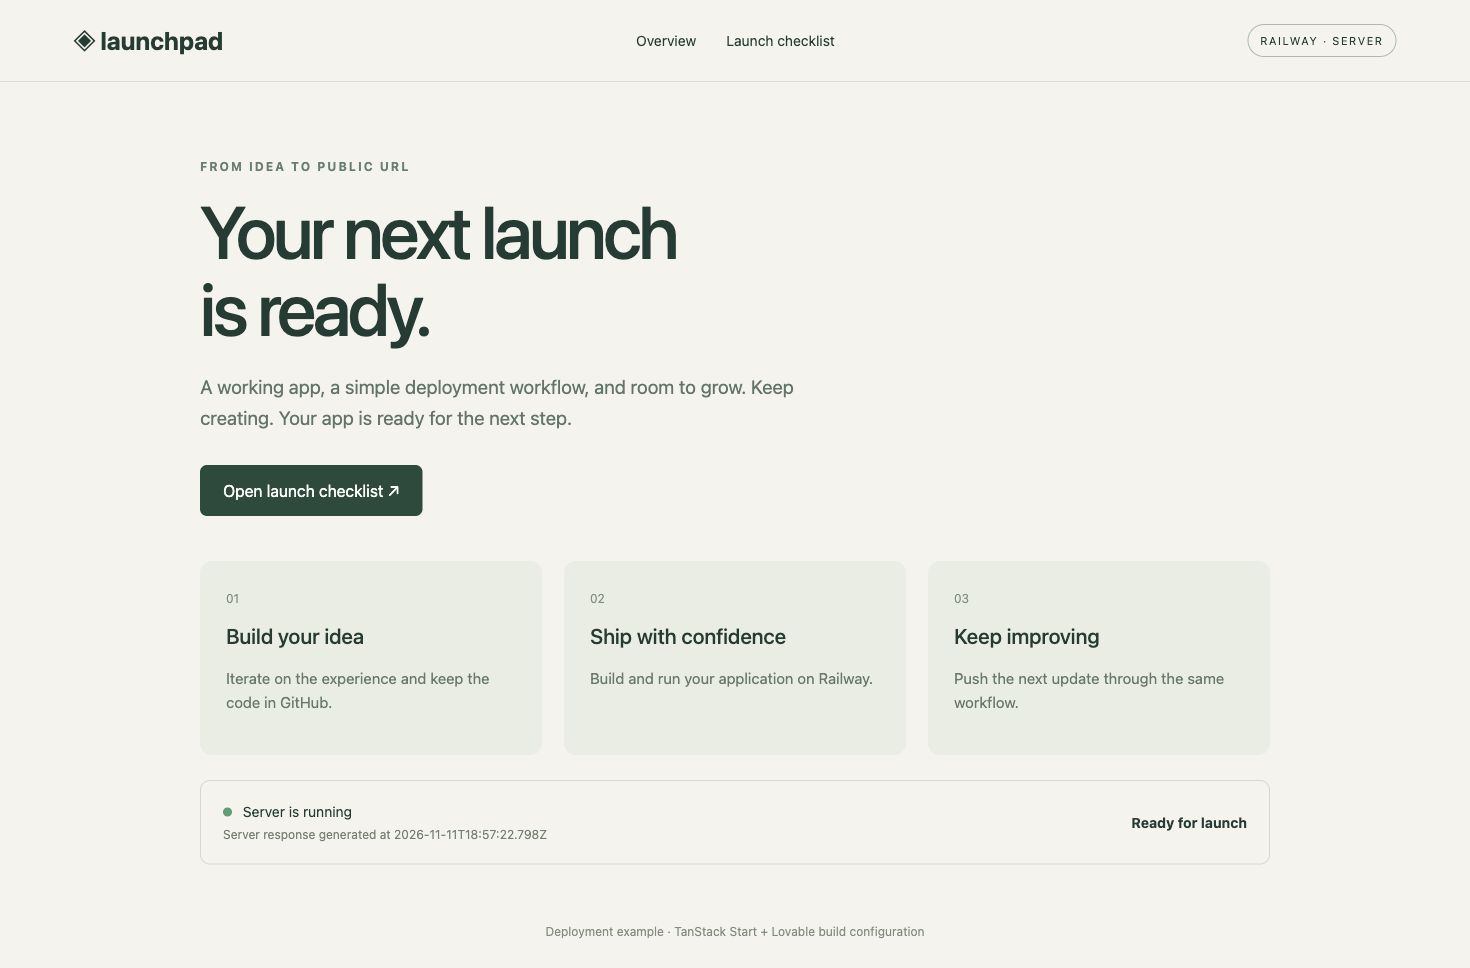
Make a small visible change in Lovable, such as updating a heading. Confirm the commit appears in GitHub, then follow its deployment in Railway. Reload the public app and check that the change appears.
GitHub autodeploys deploy new commits from the connected branch. If no deployment starts, check the selected branch, whether autodeploy is enabled, and repository permissions. At least one project member needs a connected GitHub account with contributor access to that repository.
As the app grows, you can introduce a release branch or review changes before merging into the branch Railway deploys. You can also add other services without changing how you build the web app in Lovable.
Try the example, then deploy your own app
You can deploy the Lovable deployment examples on Railway to explore both paths. The template creates two independent web services and their public domains. It needs no external credentials and runs both samples, so both count toward your Railway usage. Stop the sample services when you finish exploring.
The companion Launchpad repository separates the two hosting paths: a TanStack Start app using Lovable’s build package and an older-style React + Vite app. It includes a nested route in both variants and a request-time server response in the server variant.
These are purpose-built deployment examples, rather than exports from a Lovable workspace. They let you inspect a small working configuration before applying the corresponding setup to your own app. They don’t import your project, create a user database, or migrate your existing backend.
When you’re ready to deploy your own project, start with its GitHub repository. The existing Railway Lovable guide is a shorter reference for the connection and deployment workflow.
Frequently asked questions
Can I keep editing in Lovable after deploying to Railway?
Yes. Keep Git sync connected and deploy the intended branch in Railway. Lovable can continue updating the repository, and Railway can build those updates through GitHub autodeploys.
Does deploying to Railway move my Lovable database?
No. Deploying your repository moves the application code into another hosting environment. It doesn’t migrate database records, users, files, or backend functions. Keep the existing backend connected initially, and plan any backend migration separately.
Can I deploy a Lovable app without knowing how to code?
You can use the dashboard for the main deployment workflow and ask Lovable to help prepare the code. You still need to set the correct configuration and test the result. Check the app type first so you don’t apply static hosting instructions to an app that needs a server.
Is Railway free for a Lovable app?
Railway has a Free plan with $1 in monthly credit. Hobby costs $5 per month and includes $5 in usage, with additional usage billed beyond that amount. The Free plan’s credit is limited, so don’t assume it will cover continuous production hosting. Use the usage dashboard and cost controls to manage your budget.
Will my app have cold starts?
If you enable Railway’s Serverless setting, an inactive service can sleep to reduce resource usage. The next request wakes it and can encounter a startup delay. Leave this setting disabled if you want to avoid sleep-related startup delays. It is a cost-versus-responsiveness choice, separate from whether the app uses Vite or TanStack Start.
Why does my app build successfully but fail when I open it?
Check deployment logs for startup errors, confirm the server port and public domain, and inspect the app’s configuration. For a Vite app, check build-time variables and nested-route fallback. For TanStack Start, confirm that the server output runs. If login or data access fails, check the backend connection and allowed redirect URLs as well.